Use Flow Knowledge Base in ChatGPT
ChatGPT is an AI assistant developed by OpenAI that can help with tasks such as writing, coding, and answering questions. It adapts to context and user input to provide relevant, conversational responses. You can integrate ChatGPT into developer tools or workflows to assist with documentation, debugging, and productivity.
This guide walks you through how to create a Custom GPT with ChatGPT that can reference the Flow Data Sources file to answer questions.
You'll need a ChatGPT Plus subscription to use the Custom GPT feature.
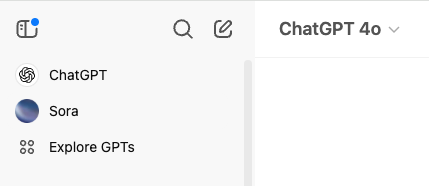
📍 Step 1: Open the "Explore GPTs" section
- Log in to ChatGPT.
- In the sidebar on the left, click Explore GPTs.

📍 Step 2: Click "Create a GPT"
- In the Explore GPTs screen, click "Create" in the top-right corner.
📍 Step 3: Walk through the GPT builder
ChatGPT will now guide you through a conversation to set up your custom GPT. First, drag and drop the Flow Data Sources All Merged file into the prompt.
Suggested prompt
_10I want to make a GPT called FlowGPT that uses the linked file as it's primary source. This file changes, so it should reference the live file at least once a day: https://github.com/onflow/Flow-Data-Sources/blob/main/merged_docs/all_merged.md
📍 Step 4: Configure the GPT's Nnme and instructions
ChatGPT may ask you to customize or verify:
- Name and description of your GPT
- Instructions: Tell it how to behave and what to prioritize (for example, always reference the uploaded document)
- Capabilities: Allow file browsing, code interpreter, or DALL·E if needed
We've found it helpful to suggest:
_10Please imagine you are a fast and smart junior developer who is eager to help and has memorized all the information in the linked file
Please let us know if you find any other useful customization prompts!
📍 Step 5: Test your GPT
After the GPT is built, a preview chat window will appear. To test it, ask a few questions based on your uploaded document.
📍 Step 6: Save and publish (optional)
When you're ready:
- Click "Update & Save" to finalize
- You can choose to keep it private or make it public
✅ That's it!
You've now created a custom GPT that references your uploaded file as a primary source. You can update the file or instructions later if needed.